


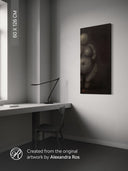
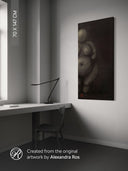
Fragments are author’s fragments of original paintings.
From a large canvas, a single node is selected — a gaze, a line, a word — and the composition is rebuilt around it.
Each fragment remains part of the painting’s overall field, yet exists as an independent work.
How to read the fragments?
• each fragment is connected to a specific original painting and its series;
• the composition and scale are re-assembled for a dedicated format and type of space;
• a key phrase is added to the image, preserving the meaning of the original and offering a clear point of entry;
• the available sizes allow you to choose whether the fragment remains a quiet signal in the interior or becomes its main visual center.
Fragments are created for different spatial scales: from small formats to large panels for generous interiors.
Thanks to high-quality photography and careful print preparation, every fragment is available in multiple sizes — from a subtle accent to a large, commanding focal point.


Vessels of Time / Potter’s Wheel / Fragment #2 / GLOSSY CANVAS


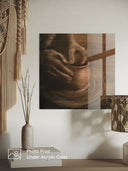
Vessels of Time / Potter’s Wheel / Fragment #2 / ACRYLIC PHOTO PRINT


Vessels of Time / Potter’s Wheel / Fragment #3 / ACRYLIC PHOTO PRINT

Vessels of Time / Potter’s Wheel / Fragment #3 / GLOSSY CANVAS
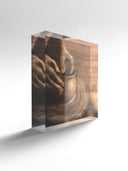

Vessels of Time / Potter’s Wheel / Fragment #3 / ACRYLIC BLOCK


Vessels of Time / Potter’s Wheel / Fragment #1 / ACRYLIC BLOCK


Vessels of Time / Potter’s Wheel / Fragment #1 / ACRYLIC PHOTO PRINT

Vessels of Time / Potter’s Wheel / Fragment #1 / GLOSSY CANVAS


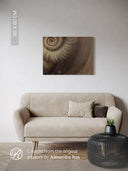
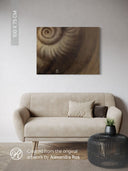
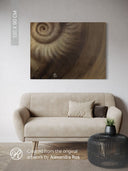
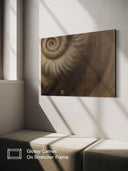
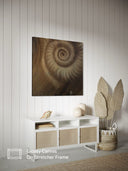
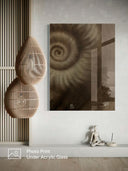
Ammonite. The Memory Spiral / Fragment #4 / GLOSSY CANVAS
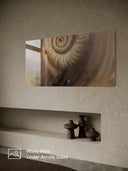

Ammonite. The Memory Spiral / Fragment #4 / ACRYLIC PHOTO PRINT

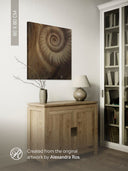
Ammonite. The Memory Spiral / Fragment #3 / ACRYLIC PHOTO PRINT

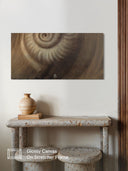
Ammonite. The Memory Spiral / Fragment #3 / GLOSSY CANVAS


Ammonite. The Memory Spiral / Fragment #3 / ACRYLIC BLOCK

Ammonite. The Memory Spiral / Fragment #2 / ACRYLIC BLOCK
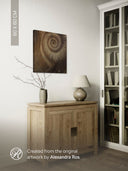
Ammonite. The Memory Spiral / Fragment #2 / GLOSSY CANVAS

Ammonite. The Memory Spiral / Fragment #2 / ACRYLIC PHOTO PRINT


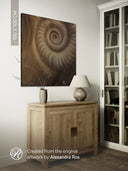
Ammonite. The Memory Spiral / Fragment #1 / ACRYLIC PHOTO PRINT

Ammonite. The Memory Spiral / Fragment #1 / GLOSSY CANVAS


Ammonite. The Memory Spiral / Fragment #1 / ACRYLIC BLOCK


Untitled / Fragment #4 / ACRYLIC PHOTO PRINT


Untitled / Fragment #4 / GLOSSY CANVAS


Untitled / Fragment #3 / GLOSSY CANVAS

Untitled / Fragment #3 / ACRYLIC PHOTO PRINT


Untitled / Fragment #2 / ACRYLIC PHOTO PRINT

Untitled / Fragment #2 / GLOSSY CANVAS


Untitled / Fragment #2 / ACRYLIC BLOCK

Untitled / Fragment #1 / ACRYLIC BLOCK


Untitled / Fragment #1 / ACRYLIC PHOTO PRINT

Untitled / Fragment #1 / GLOSSY CANVAS
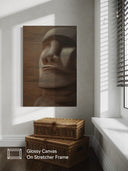


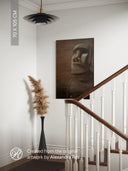
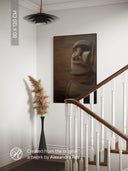
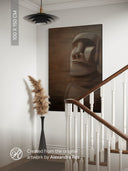
Moai. The Silent Witness / Fragment #4


Moai. The Silent Witness / Fragment #3 / ACRYLIC BLOCK

Moai. The Silent Witness / Fragment #3 / GLOSSY CANVAS


Moai. The Silent Witness / Fragment #3 / ACRYLIC PHOTO PRINT


Moai. The Silent Witness / Fragment #2 / ACRYLIC PHOTO PRINT


Moai. The Silent Witness / Fragment #2 / GLOSSY CANVAS

Moai. The Silent Witness / Fragment #1 / ACRYLIC BLOCK


Moai. The Silent Witness / Fragment #1 / ACRYLIC PHOTO PRINT

Moai. The Silent Witness / Fragment #1 / GLOSSY CANVAS
Editions & Objects
Vessels of Time / Potter’s Wheel / Fragment #2 / GLOSSY CANVAS
Vessels of Time / Potter’s Wheel / Fragment #2 / ACRYLIC PHOTO PRINT
Vessels of Time / Potter’s Wheel / Fragment #3 / ACRYLIC PHOTO PRINT
Vessels of Time / Potter’s Wheel / Fragment #3 / GLOSSY CANVAS
Vessels of Time / Potter’s Wheel / Fragment #3 / ACRYLIC BLOCK
Vessels of Time / Potter’s Wheel / Fragment #1 / ACRYLIC BLOCK
Vessels of Time / Potter’s Wheel / Fragment #1 / ACRYLIC PHOTO PRINT
Vessels of Time / Potter’s Wheel / Fragment #1 / GLOSSY CANVAS
Ammonite. The Memory Spiral / Fragment #4 / GLOSSY CANVAS
Ammonite. The Memory Spiral / Fragment #4 / ACRYLIC PHOTO PRINT
Ammonite. The Memory Spiral / Fragment #3 / ACRYLIC PHOTO PRINT
Ammonite. The Memory Spiral / Fragment #3 / GLOSSY CANVAS


